
Summary Replacing a turbocharger is three jobs, not one: taking the old unit off, correcting whatever destroyed it, and fitting the next one without destroying that as well. The middle job decides whether the repair holds, because every recognised cause of turbo failure sits outside the turbocharger and stays bolted to the car when the unit comes away. Below is the job in the order it happens — what to settle before anything is undone, what the open access is worth as an inspection, how the unit is fitted and primed, and where a general guide has to hand over to your vehicle’s own data.
Of the four causes of turbocharger failure the trade recognises, not one of them starts inside the turbocharger.
Bolting a turbocharger on is not the difficult part of replacing one. The difficult part is everything it was attached to, because that is where the failure came from, and none of it leaves the car when the turbo does.
What follows is the job in the order it happens, including the refit steps where a new turbocharger is most often ruined inside its first minute of running. Where a figure depends on your engine, this page says so rather than guessing at it.
Where the Job Divides: the Car and the Turbocharger
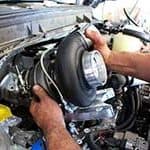
The job splits at the mounting flange. On the car sits the labour — access, disconnecting the exhaust, intake, oil and boost-control connections, lifting the unit out, correcting what the inspection turns up, refitting, changing the oil and filter, running the engine up. That work is identical whether a brand-new turbocharger goes back on or your own unit returns rebuilt.
Off the car sits the turbocharger, and that is the only part of the job the replace-or-rebuild choice actually touches. So the decision does not have to be made first. The unit has to come off either way, and once it is off you are holding the most informative piece of evidence about why it failed.
Why the Cause of the Failure Stays on the Car

Turbocharger manufacturers and reconditioners describe four causes of failure, and the list is consistent across the trade: interrupted or inadequate lubrication, oil contamination, foreign-object damage, and overspeed. Read it carefully and something awkward emerges. Not one of the four originates inside the turbocharger.
| Recognised cause | Where it actually lives | What that means for the refit |
|---|---|---|
| Inadequate or interrupted lubrication | Oil pressure at the engine and at the turbo, the supply line, any inline filter or gauze strainer, the oil pickup screen | A new unit fed by the same restricted supply starves on the same schedule |
| Oil contamination | Carbon and metal circulating in the engine oil — from a failed component, an engine rebuild, excessive heat, or a poor service history | Abrasive oil wears bearing surfaces, thrust components and the shaft whatever is bolted on |
| Foreign-object damage | The air cleaner assembly and every section of induction pipework between it and the compressor | Debris left in the intake tract reaches the new compressor wheel on the first start |
| Overspeed | The charge-air system — a split intercooler or hose — plus over-fuelling, faulty engine management, or a turbo fitted to the wrong application | The replacement runs beyond its safe speed exactly as the first one did |
The turbocharger is where the damage becomes visible, which is a different thing from where it began. A driver notices the smoke, the noise or the lost boost, buys the part making the noise, and fits it into conditions nobody has changed.
One detail from the same trade guidance catches people out: a loose or missing compressor wheel locknut is a consequence of the failure, not its cause. Find it before anything new goes on, because a nut loose in the intake tract is foreign-object damage waiting for a fresh compressor wheel.
What to Settle Before Anything Is Undone
That the turbocharger is genuinely the fault. Lack of power, noise under load, excessive smoke and oil consumption are the complaints that send people to this job, and every one can be produced by something else: the fuel injection system, the engine management, a sensor or wiring fault, a restricted crankcase breather, or a restriction in the intake or exhaust.
Our guide to which symptom points at which end of the turbocharger narrows that down before anything is undone. If your evidence is behavioural rather than physical — a code, limp mode, a fault only when hot, power returning after a restart — the boost-control side is at least as likely; our pages on turbo actuator symptoms and what a turbo actuator does cover that half.
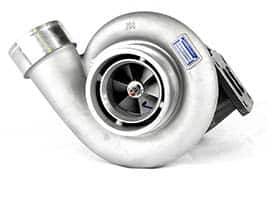
Which unit you have. Work from the plate on the compressor housing, not the badge on the car; one model name frequently covers more than one turbocharger, as our Garrett GT2052V page sets out.
Your vehicle’s own data. Torque figures, tightening order, which fasteners are specified as new, oil grade and capacity, and the route the unit takes out of the bay are all vehicle-specific. No general guide can supply them, and a figure that is nearly right is worse than none at all on an exhaust joint.
The parts, before the old unit comes off. Correct new gaskets, a new oil feed pipe, the banjo bolts and copper washers if your engine uses them, a new oil filter with the correct grade of fresh oil, and a new air filter. Renewing the feed pipe alongside the turbocharger is recommended by manufacturer installation guidance and the reconditioning trade alike.
A safe way of working. Work on a cold engine: the exhaust side holds heat long after shutdown and the oil is hot enough to scald. If access is from underneath, the vehicle must be raised and supported on axle stands or a lift, never on a jack alone. Without a safe way to do that, this is not a driveway job — an answer worth reaching before the first bolt moves.
Removing the Turbocharger: the Four Systems Holding It On

Every turbocharger is attached to four systems. The order they come apart in is vehicle-specific and belongs to your manufacturer’s procedure, but knowing the four makes the job legible, and each disconnection is an inspection you only get once.
The exhaust side. The turbo mounts to the manifold or the block, with the downpipe carrying gas away from the turbine housing. This is where the time goes, because fasteners in an exhaust joint corrode and seize. Old gasket material has to come off the flange faces before anything is refitted, and those faces must be clean and undamaged.
The intake and boost side. The hose at the compressor inlet, and the charge pipework running to the intercooler and on to the inlet manifold. If a failed turbocharger has been passing oil it collects here, and it must be cleared before the engine is cranked again — the intercooler is drained and cleaned rather than reconnected as found. That is not tidiness: liquid drawn into a cylinder does not compress, and an engine that tries to compress it damages itself severely.
The oil side. A pressurised feed into the bearing housing and a gravity drain out of it. Both come off, and both openings on the engine are best plugged the moment they are open, because everything you do above them produces debris.
The boost-control side. Either a pneumatic wastegate can with a rod to the flap, or an electronic actuator with a wiring connector. Leave the wastegate rod’s setting alone — its length is set to that turbocharger’s specification and is not a driveway adjustment, which is the subject of our wastegate actuator repair page. If yours is an electronic actuator, unplug it and handle the unit by its housings.
Bag and label fasteners by joint, and keep the old gaskets to compare against the new ones before anything is torqued in.
What to Inspect While the Turbocharger Is Off
With the unit out you have access you will not have again without repeating the whole job. This is the correcting-the-cause work, and it maps onto the four causes above.
The oil feed pipe is the one to start with, because it is the part almost everyone reuses and nobody can assess. Flexible liners collapse internally, and a pipe routed close to a heat source can be damaged inside while looking perfect outside — common across a number of vehicles and genuinely difficult to detect without cutting the pipe open. Fitting a new one with the turbocharger is standard advice rather than an upsell.
- The oil drain — check internally for the same collapse. It works on gravity alone, so a partial restriction raises pressure in the bearing housing and pushes oil past seals in perfectly good condition.
- Oil pressure at the engine and at the turbocharger, against the manufacturer’s specification. Replace any inline filter in the supply line and inspect the oil pickup screen for carbon build-up.
- The air path — the air cleaner assembly sealing and unblocked, induction pipework free of perforations, and no loose washers, bolts or debris left anywhere in it.
- The charge-air system — pressure-test the intercooler and check the hoses and gaskets through to the inlet manifold. A leak here is not just lost boost; it is a recognised route to overspeed. A larger-diameter exhaust reduces back-pressure and can push a turbo the same way.
- The engine breather — inspect and clean it, and replace the hose if it has collapsed internally. Crankcase pressure that cannot escape finds the turbocharger’s seals instead.
If none of that produces a cause, the failed unit is the remaining evidence: the wear on its own parts records what it was living with. That is why failure analysis on the old turbocharger beats a guess, and why on our bench the strip is also the diagnosis.
Fitting a Replacement, or Refitting Your Own Rebuilt Unit
The practical difference is not the one most people expect.
A replacement turbocharger frequently arrives with its bearing, compressor and turbine housings set at a different orientation to the one on your car — the same unit fits several applications in different positions, and units are sometimes clocked for shipping. It has to be reorientated before it goes near the engine: slacken the v-band nut, circlip or bolts between the end housings and the centre rotating assembly, reposition the housing without pinching or damaging the compressor housing O-ring, confirm it is firmly seated and not misaligned, then retension to the specified figure once the unit is mounted.
Your own unit, rebuilt, never raises that question — it comes back oriented exactly as it came off, because it has never fitted anything else. It also comes back with the reason it failed addressed rather than reinstated: a wastegate pivot, bearing, seal or actuator with a known weakness is uprated on the bench, where a replacement carrying the original design restarts the clock.
Rebuilding here is a mail-in service. You take the unit off and post it to our Epsom workshop from anywhere in the UK or internationally; it is stripped to component level, measured against original specification, rebuilt on genuine OE or OEM-grade components, balanced and bench-tested, then returned ready to refit. You get your own turbocharger back rather than an exchange unit off a shelf. Postage and packing are in our FAQs, worth reading before you box anything; the car is off the road while the unit is away.
Turbo Repairs · Epsom workshop
The unit is off the car. Now find out what it died of
Post it to our workshop and it is stripped, measured and inspected before anything is quoted, so you are told what the wear says about your engine — not only which parts we fitted. That answer is what stops the next one failing the same way.
Lifetime, unlimited-mileage warranty · Mail-in from the UK and internationally · Bench-tested and calibrated before it ships
Refitting: the Steps That Ruin New Turbochargers
Most turbochargers that fail early are not faulty. They are fitted in a way that guarantees the outcome, and it happens in a handful of identifiable places.
Clean, undamaged flange faces. Remove all old gasket material from the exhaust manifold, the exhaust pipe and the oil flange fittings before a new gasket is asked to seal against them.
Take the blanking plugs out. Turbochargers ship with plastic or foam plugs in their openings to keep debris out. Every one has to come out, and finding one still in place afterwards is not a recoverable situation.
The right gasket, the right way round. Use the correct new gasket or O-ring throughout. On the oil supply gasket the centre hole must line up with the centre hole on the mounting flange — fitted a few degrees out, it restricts the feed the unit depends on.
No liquid sealant on the oil supply or drain. This one destroys turbochargers. Sealant used alongside an oil supply or drain gasket can be pushed into the oil passage, where it reduces or blocks flow to the bearing housing. Use the specified gasket, dry.
Torque to your vehicle’s figures, in your vehicle’s sequence. Nobody can give you these on a general page. A torque figure also assumes a fastener condition — visually clean, and lubricated or dry as specified — so read the whole instruction, not only the number, and use new fasteners where the data calls for them.
Prime it before it ever turns under power. With the drain line fitted to the turbocharger, pour clean fresh engine oil into the turbocharger’s own oil inlet, then connect the feed line. That is the manufacturer’s instruction, and it exists because a bearing system reaching operating speed before oil arrives is damaged in seconds. Then spin the compressor wheel by hand: it should turn freely, and some in-and-out movement of the wheels is normal. Treat that as a check that the unit turns, not a measurement of wear — acceptable movement differs between journal-bearing and ball-bearing designs and is established on a bench, not by feel.
Handle an electronic actuator by its housing only. The gears inside an electronic turbo actuator are self-blocking, so the operating arm and connecting rod cannot be moved by hand. Forcing them with a tool breaks the gears and can render the turbocharger unusable — damage that is generally excluded from warranty.
Airtight connections, new oil and filters. Confirm every joint on the compressor housing is genuinely airtight, then fit the new oil filter, the correct grade of oil and the new air filter before the engine is turned.
The First Start, and Why Cranking Comes Before Starting

The first two minutes matter more than anything else in this job, and the sequence is not intuitive.
Crank without starting first. Turn the engine over on the starter for ten to fifteen seconds without letting it fire, to prime the oil feed; the method of inhibiting the start is vehicle-specific and belongs to your manufacturer’s data. This is the step most commonly skipped, and it is the difference between a turbocharger that has oil in its bearing housing the moment it first spins and one that does not.
Then start it and leave it alone. Let it idle for three to four minutes and use that time to inspect for oil, gas and air leaks. Find one and stop immediately rather than finishing the job and coming back to it. Do not rev the engine or put it under load during this period.
Movement and noise from the control side are normal. On a variable-geometry turbo the actuator, vane arm and vane mechanism should move during key-on and start-up, and a high-pitched noise from an electronic actuator then is expected rather than a fault. If you see no movement at all, investigate on the vehicle rather than assuming the part is wrong: actuator travel is set and tested before a unit leaves the workshop.
Stop, and check the oil level again. Shut the engine off and confirm the oil sits between the minimum and maximum marks. Priming the turbocharger, filling a new filter and refilling the system all move that level. Check it once more after the first gentle drive.
How Long Replacing a Turbocharger Takes
Commonly published UK estimates put the job at three to four hours for an experienced technician with the right tools, rising to around eight in the more difficult cases. Four things drive the spread: access, which ranges from the turbo being in front of you to half the engine bay coming apart; twin-turbo installations, which take longer and raise the question of what the second unit has been living through; seized exhaust fasteners, which can add hours before the turbo is touched; and parts availability on an older vehicle.
None of that changes if the unit is rebuilt rather than replaced. The on-car labour is the same job; only the wait in the middle differs.
Replacing a Turbocharger: FAQ
Can I have my own turbocharger rebuilt instead of buying a replacement?
In most cases, yes — and you need not decide before you start. Removal and refitting are the same work either way, so the unit can come off first and the decision be made once you are holding it. Sending it in has one advantage a replacement cannot offer: the strip is also the diagnosis.
Why does a replacement turbocharger not always match the orientation of the old one?
Because the same turbocharger is often fitted to several applications in different positions, and units are sometimes clocked for shipping. The housings can be repositioned relative to the centre rotating assembly by slackening the v-band nut, circlip or bolts, taking care not to pinch the compressor housing O-ring, then retensioning once mounted. A rebuild of your own unit never raises the question.
Does a new turbocharger need to be primed with oil before the engine is started?
Yes. With the drain line fitted, clean engine oil is poured into the turbocharger’s oil inlet before the feed line is connected, and the engine is then cranked for ten to fifteen seconds without being allowed to fire so the feed fills. A bearing system that reaches speed before oil reaches it is damaged almost immediately.
Do I really need to replace the oil feed pipe?
It is recommended by turbocharger manufacturers and by the reconditioning trade, and the reason is that you cannot inspect it. Flexible liners collapse internally, and heat damage happens inside a pipe that looks sound from outside — difficult to detect without cutting it open, at which point you need a new one anyway.
Why did my replacement turbocharger fail as well?
Almost always because the cause was never on the turbocharger. A restricted oil supply, contaminated oil, debris in the intake tract and a charge-air leak all sit on the car, survive the replacement and go to work on the new unit at the same rate.
Final Thoughts
The instinct on this job is to treat the turbocharger as the problem and the fitting as the solution. It is the wrong way round often enough to be worth resisting: the unit is where the failure became visible, and the conditions that produced it are still on the engine, unchanged, waiting for whatever goes on next.
So the parts of this job worth being slow about are not the ones that look difficult. They are the oil feed pipe nobody can inspect, the intake tract nobody empties, the intercooler leak nobody pressure-tests, and the fifteen seconds of cranking before the first start. None is hard. All are skipped, and between them they account for most of the turbochargers that fail twice.
If you end up with the unit in your hands and no clear answer as to why it failed, the answer is inside it. Send it to us: we will read it out of the parts and tell you what has to be corrected on the car before it goes back.
Turbo Repairs · Epsom workshop
Rebuild the turbocharger you already own
Tell us the vehicle, the references off the plate and what the car was doing when it failed. The unit is stripped to component level, measured against original specification, rebuilt on genuine OE or OEM-grade parts, balanced and bench-tested, then returned oriented exactly as it came off and ready to refit.
Lifetime, unlimited-mileage warranty · Mail-in from the UK and internationally · Bench-tested and calibrated before it ships